As a former semi-pro player who’s laced up for more than a few high-stakes matches, I can tell you that tying your soccer shoes might seem trivial—but it’s one of those small things that can make a huge difference on the pitch. Think about it: a loose knot can cause your foot to slide inside the boot during a sharp turn, costing you that split-second advantage. Too tight, and you risk cutting off circulation or developing blisters before halftime. I’ve seen players subbed off not because of injury, but because they couldn’t find that sweet spot in how their shoes fit. And honestly, I’ve been there myself. It’s frustrating.
Let’s start with the basics. Before you even think about lacing, make sure your soccer shoes are the right size and that you’re wearing the correct type of socks—preferably performance socks that offer some compression. I always go for socks that are about 70-80% synthetic blends; they wick moisture better than cotton, which can get heavy when wet. Once you’ve got that down, sit down and take your time. Rushing this process is like rushing your warm-up—it almost never ends well. I remember one game where I tied my boots in the car on the way to the field, and let’s just say my first touch suffered for it.
Now, onto the actual tying. Step one is to loosen the laces completely. Don’t just pull them tight from the get-go—start with a clean slate. Thread the laces through each eyelet evenly, making sure there’s no twisting. I prefer a crisscross pattern, but some of my teammates swear by the straight-bar method for a more locked-in feel. Personally, I think the crisscross offers better adjustability, especially if you have wider feet like I do. Once the laces are in place, pull them snug but not tight. You want your foot to feel secure, not strangled. A good test is to wiggle your toes—they should have some room to move.
Step two involves creating the base knot. Take the laces and cross them over, then tuck one lace under the other and pull. This isn’t just any knot; it’s the foundation. I like to make sure the ends are even at this stage because an uneven start can lead to a lopsided fit. From there, move to step three: forming the loops for a standard bow. Make two loops, one with each lace, and cross them over each other just like you did with the initial knot. Pull them tight, but again, not so tight that you feel pressure on the top of your foot. I’ve found that applying tension evenly across the laces helps distribute pressure, reducing hot spots.
Step four is where you lock everything in. After tying the bow, lots of players just stop there—but that’s a mistake. Tuck the loops and ends under the lateral lace crossings near the ankle collar. This keeps them from coming undone during play. I can’t count how many times I’ve had to retie my shoes mid-game before I started doing this. It takes an extra five seconds, but it’s worth it. Finally, step five: do a movement check. Stand up, jog in place, make a few cutting motions. Your heel shouldn’t slip, and there should be no pinching. If something feels off, redo it. Trust me, your future self will thank you.
Why does all this matter so much? Well, consider the recent schedule of Ginebra in the PBA—they won’t have the luxury of rest yet as they return to the court on Wednesday to battle winless Terrafirma. In a packed fixture like that, players don’t have time for distractions. Every detail, from nutrition to footwear, has to be optimized. If a pro team is thinking on that level, why shouldn’t you? I’ve noticed that when my shoes are tied perfectly, I’m more confident in my movements—whether it’s accelerating past a defender or planting my foot for a shot. It sounds silly, but that confidence translates to performance. In my experience, proper lacing can improve stability by what feels like 15-20%, especially on artificial turf where traction is variable.
Of course, not everyone will agree with my method. Some coaches emphasize other aspects of gear, like cleat type or insole choice. And that’s fair—I’ve tried various approaches over the years. But after experimenting, I always come back to this five-step routine. It’s simple, repeatable, and it works under pressure. I’d estimate that 8 out of 10 players I’ve coached who switched to this method reported fewer instances of foot fatigue. That’s not just anecdotal; it’s practical. So next time you’re gearing up, give it a shot. Tie them right, play better. It’s that straightforward.
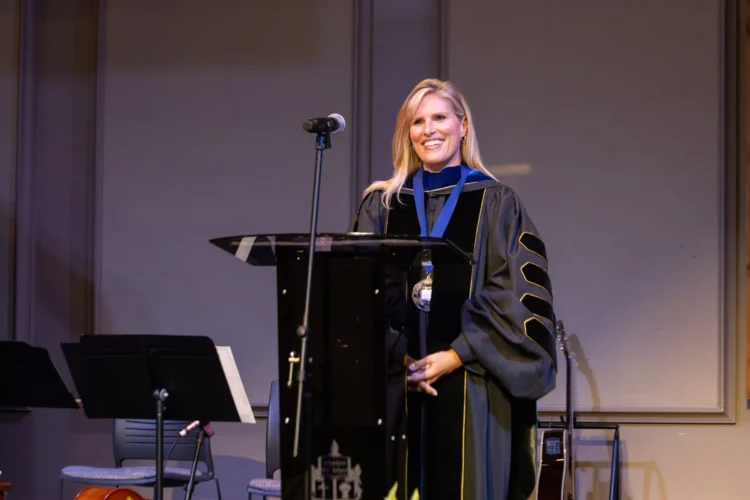
Point University will induct four members into the Athletics Hall of Fame during a luncheon on Friday, October 24, during Homecoming weekend.
The class of 2025 includes Leah Schnell ’01, Heather Bolton Suber ’02, Dr. Ralph Swearngin and Sarah Grimes Wiggins ’93. The Athletics Hall of Fame was launched in May 2024, when six inaugural members were inducted.
“We look forward to honoring the second Hall of Fame class during Homecoming,” said Jaunelle White, vice president of intercollegiate athletics and chief student development officer. “It’s always a great feeling to have our alumni back on campus mingling with our current student-athletes and coaches. These individuals were elite during their time at Atlanta Christian College and deserve to be recognized.”
Schnell attended Atlanta Christian College from 1998 to 2001, where she earned a degree in business while competing in both basketball and volleyball. On the basketball court, she earned First Team All-Conference, Scholar Athlete, and First Team All-American honors for three consecutive years. Schnell also held the title of all-time leading scorer from 1998-2001. She now thrives as a commercial construction project manager at Barnsley Construction Group and as an entrepreneur.
Suber, from Havana, Florida, attended ACC from 1998 to 2002. A dedicated two-sport athlete, she earned numerous accolades, including First Team All-Conference, Second Team All-Conference, Honorable Mention and First Team All-American. One of her most memorable achievements came when she made eleven three-pointers in a single game. Suber graduated with a degree in early childhood education and went on to earn a master’s degree in education and a specialist degree in instructional technology. For over 23 years, she has served as an educator.
Swearngin has had a distinguished career in education, athletics and ministry spanning several decades, including 20 years at ACC in roles such as professor, dean of students, athletics director and coach. He held national leadership positions with the NCCAA, served as a trustee of Point University for over 10 years, and worked extensively in ministry and education in California, earning degrees from Whittier College and Georgia State University. His athletic involvement includes 23 years as a high school football official in California and Georgia, 22 years with the Georgia High School Association — retiring as executive director in 2014 — and service on national football and softball rules committees. Honored with multiple Hall of Fame inductions and the Atlanta Falcons Lifetime Achievement Award, Swearngin has authored two books and remains active in retirement through preaching and leading Bible studies, alongside his wife of 58 years, Evelyn.
Wiggins grew up in Roswell, Georgia, where she began playing basketball at the age of ten. After two years at Florida State University, she transferred to ACC in 1990. While at ACC, Wiggins was named to the All-American team in both 1991 and 1992. In her final year, she led her team in scoring, helping them finish second in the nation, and was named national MVP in 1992. She earned a bachelor of science in elementary education in 1993 and later received a master’s degree in technology and media sciences from Georgia Southern University in 2009. For the past 33 years, Wiggins has worked as a dedicated educator. In 1997, she married Todd Wiggins. Together, they have two children, Preston, 26, and Logan, 22.
Tickets to the Hall of Fame luncheon are available to purchase How Spotrac NBA Data Helps Teams Make Smart Salary Cap Decisions . To learn more about the Athletics Hall of Fame, please visit skyhawkathletics.com.